Confused by Japan’s trains and subways? You’re not alone. The system is fast, clean, and brilliantly efficient, once you understand it. But to the untrained eye (read: every jetlagged tourist arriving in Tokyo), it’s a maze of ticket machines, beeping gates, and signs that don’t always match what’s on Google Maps. After spending 2 weeks crisscrossing Japan, I cracked the code. This guide is the step-by-step breakdown I wish I had before landing: how to use PASMO cards, the difference between train and subway tickets, booking JR trains, and the mistakes tourists should avoid.
The Difference Between Train Tickets and Subway Tickets in Japan
The first hurdle: subways vs trains.
- Subways (Tokyo Metro, Osaka Metro, etc.): local underground systems for zipping around the city.
- Trains (JR East, JR West, Shinkansen, etc.): long-distance, intercity, and regional travel.
The tickets are not interchangeable.
1. PASMO Card for Subways
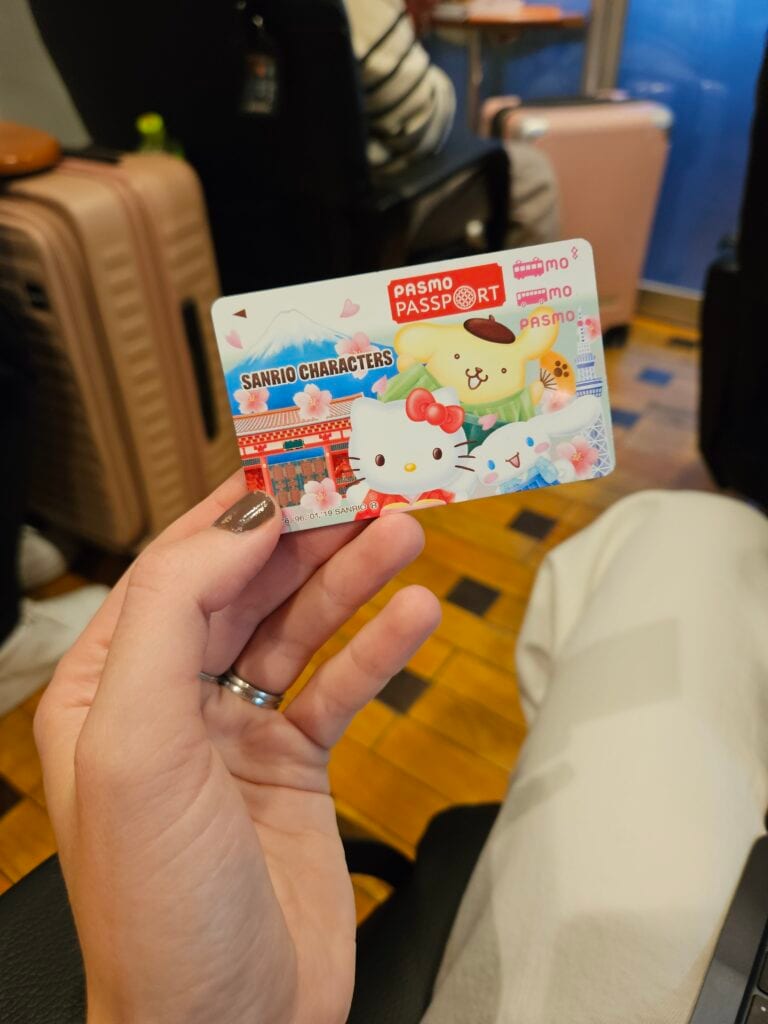
On arrival at Narita Airport, we bought a PASMO card (a rechargeable card). You can use it on subways, buses, some taxis, and even vending machines. Just tap in and out at the gates, and the correct fare is deducted. It is accepted throughout most of Japan. Patrick and I primarily used it for subways.
💡 Tip: Always tap out. If you forget (like we did transferring from the Tokyo subway to the Shinkansen at Shibuya), your card will be “stuck” in that station — meaning it won’t work until you visit a JR help desk.
2. Train Tickets (JR & Shinkansen)

Unlike the subway, trains usually require physical tickets. You’ll get two: a fare ticket and a seat reservation. Insert both together at the gates, with the fare ticket on top. (The machine will yell at you if you get it wrong.)
How to Use the Subway in Japan as a Tourist
- Tap the PASMO card when entering a subway station.
- Ride to your destination.
- Now, the most important thing is to always remember to TAP OUT when you arrive at another subway station. The fare will be deducted as you leave. The screen on the turn style will show you how much money you have left on your PASMO card. Now, the tapping out is extremely important. Why? Because if you don't, you will not be able to use your PASMO card again.
Pat and I made this mistake when in Tokyo. We took the subway from Gotanda to Shibuya Station. When in Shibuya Station, instead of tapping out of the subway station, we stayed in and walked directly to the Shinkansen line. Feels quite natural right? Why would we leave the station and then walk back in when the Shinkansen is in the same train station. That was a MISTAKE. We should've tapped out with the PASMO card. Then punched our Shinkansen TRAIN tickets to get back into the station. By not tapping out, next time we tried to use the PASMO cards in Osaka, we were told "our card is still in Gotanda, Tokyo." Well it wasn't...we were physically holding it in Osaka haha. The only way to unblock the card was to visit a JR Train point of sale...Mamma mia...Japanese culture is quite inflexible in that regard, more on the lessons learned about Japanese culture here.
Common Mistake
Thinking you don’t need to tap out when transferring inside the same station. Always tap out before switching to a JR train or Shinkansen.

Tips for Booking JR Trains
After doing some math, the JR Pass (an all inclusive pass that includes shinkansen service, limited express trains, local trains, some JR buses and even the Hiroshima-Miyajima ferry) was not the most cost efficient option for Pat and I. While it is a great option for those traveling around all of Japan for more than 7 days, it does not include some shinkansens like the Nozomi and Mizuho—which is what Pat and I needed. You can read more about the exclusions of the JR Pass here and determine whether it's the right cost-effective option for you. After doing the math, we decided not to purchase it. Therefore, we booked trains individually. Some things to keep in mind when booking trains individually:
How to Use Train Tickets in Japan
Once you purchase your tickets online (more on that below) you pick up your train tickets from a JR point of sale once in Japan, remember to pick them up from the correct location. Do not pick up JR West tickets from a JR East location and vice versa. Read your confirmation email for more directions on where to pick them up. Once you pick them up, you will be given 2 tickets for each ride. See below. Now what's the difference between the two and how do you use them?
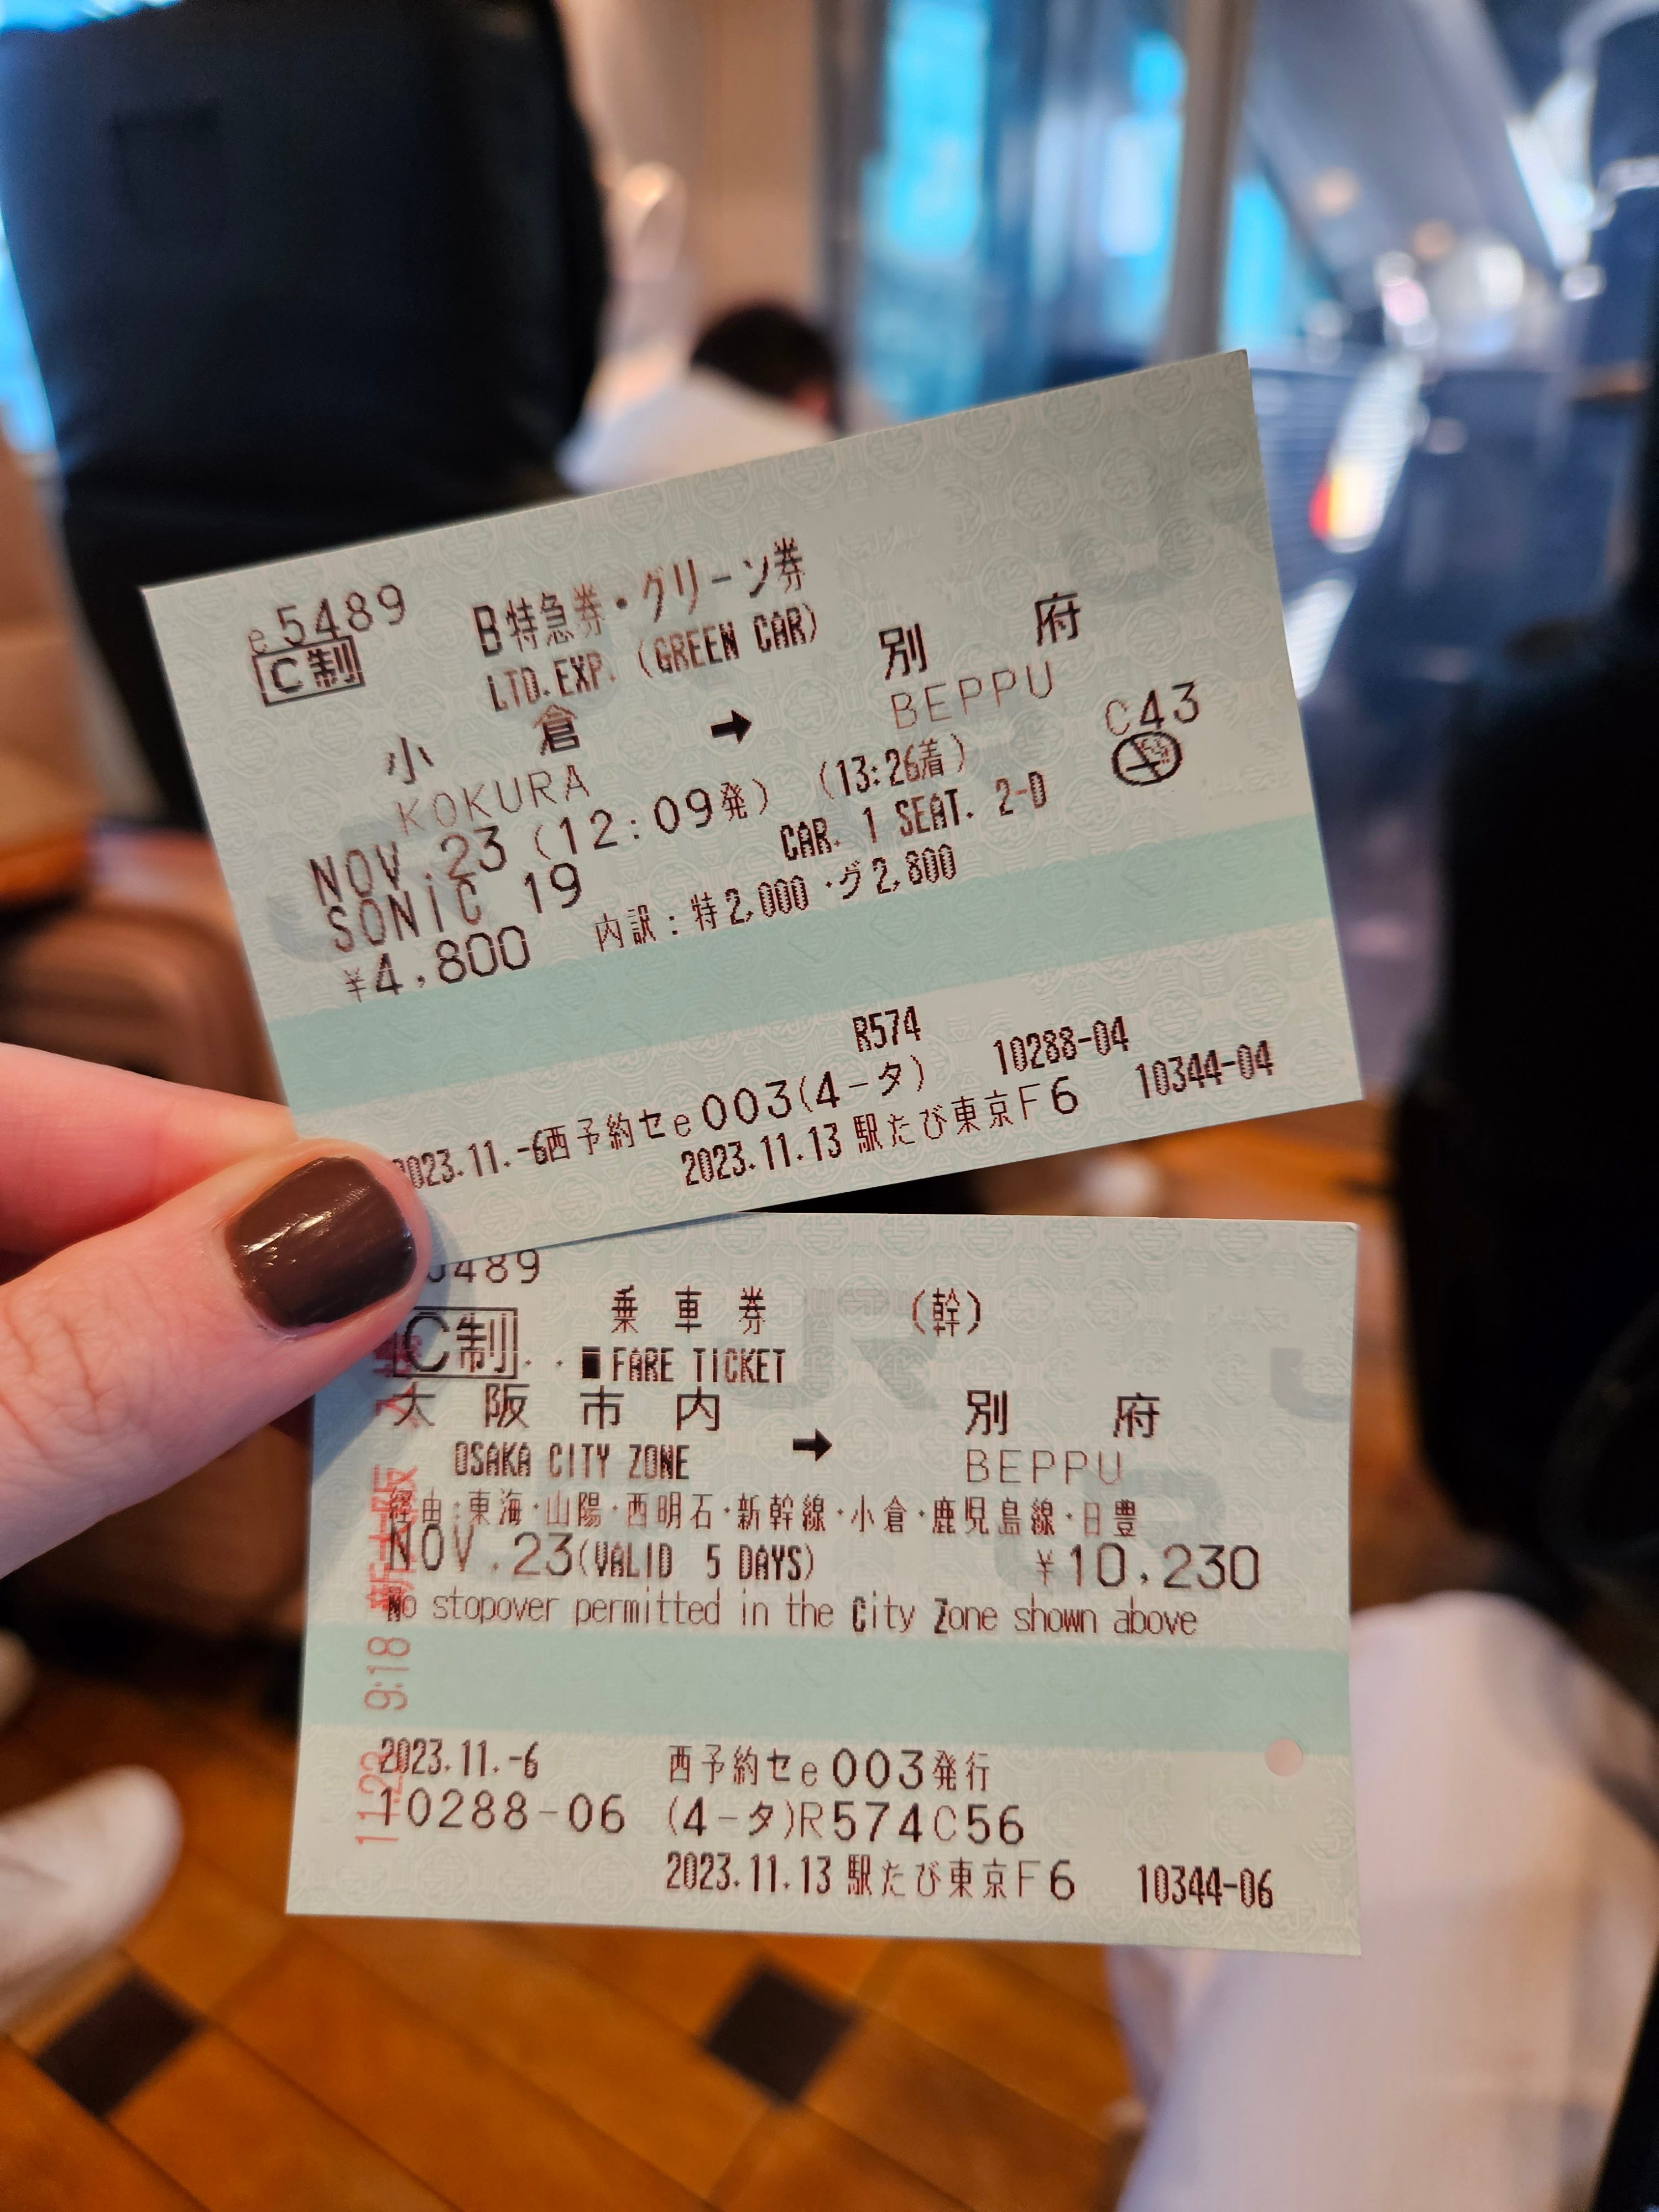
One is a fare ticket and the other is a seat ticket. In order to get in and out of the train station you need to have both. You will need to insert the tickets into the turn style when you enter and leave the train station. When inserting the tickets you need to insert them together, one on top of the other. The fare ticket should always be on top otherwise the machine will yell at you and you'll have to go to a ticket officer next to the gate.
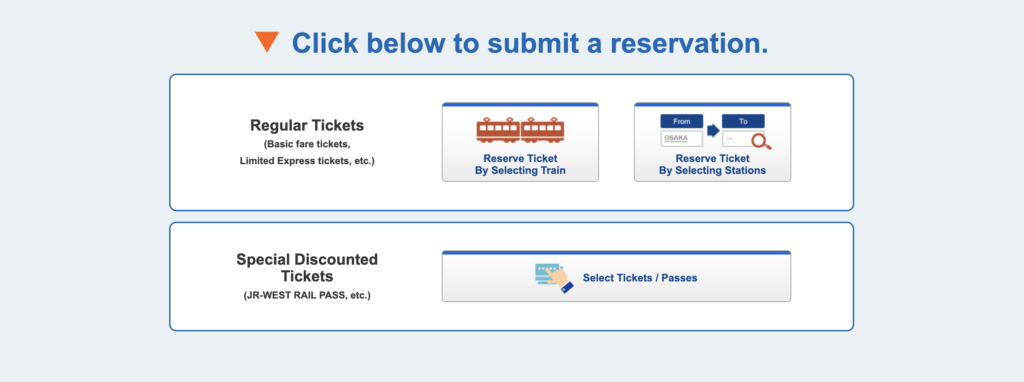
How to Book Train Tickets on Japan Railway Website
Go the appropriate JR website, depending if you're heading East, West, North or South. In my case, I was heading West. Once on the website, find the section that says Regular Tickets. You have two options, select the "Reserve Ticket by Selecting Stations."
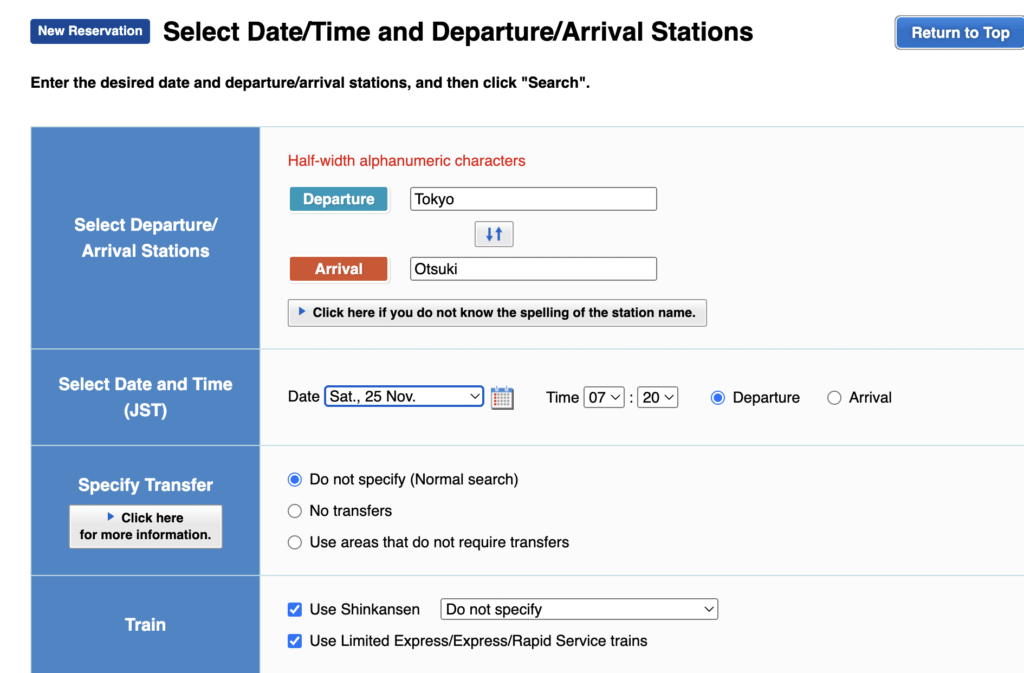
You may not find your final destination on the website. Like I said, not all trains can be purchased in advance. If you don't see your final destination on the site, look at a website like Rome2Rio or Google Maps to understand where you need to layover and what station you should be plugging into the JR website. In my case, the layover was in Otsuki. I then looked up separately the timetable from Otsuki to Kawaguchiko online.
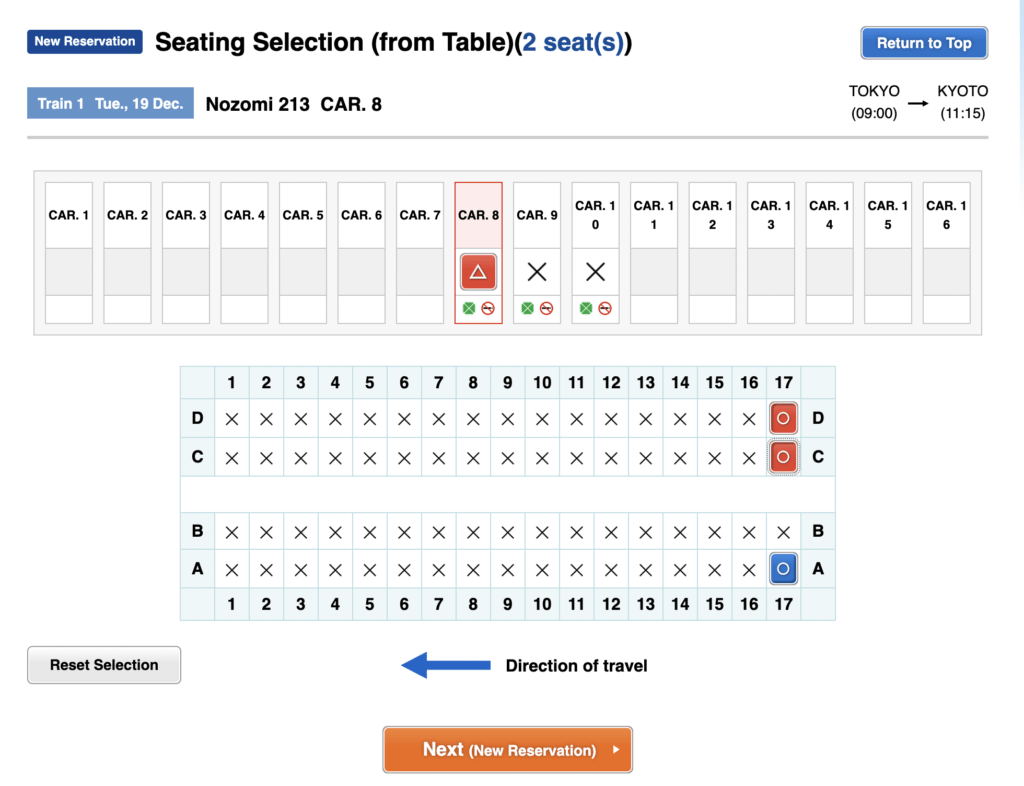
Once you click continue, you will now have the chance to book your car. I always opt for the Green Car. More on why in the next section below. Additionally, this is where if you have oversized luggage, I recommend you select the option. When you select it you will have 3 options - to place it behind your seat, place it in a carrier/holder, or be seated next to a smoking room. We liked the option of placing it directly behind the seat. That means your seat selection will only be available at the back of every car, but it's super comfortable, trust me!

After selecting your seat, you will be asked what tickets you want to buy. Remember, this is the point where you want to buy BOTH tickets - limited express and basic fare. You will not be able to enter the train stations without both.
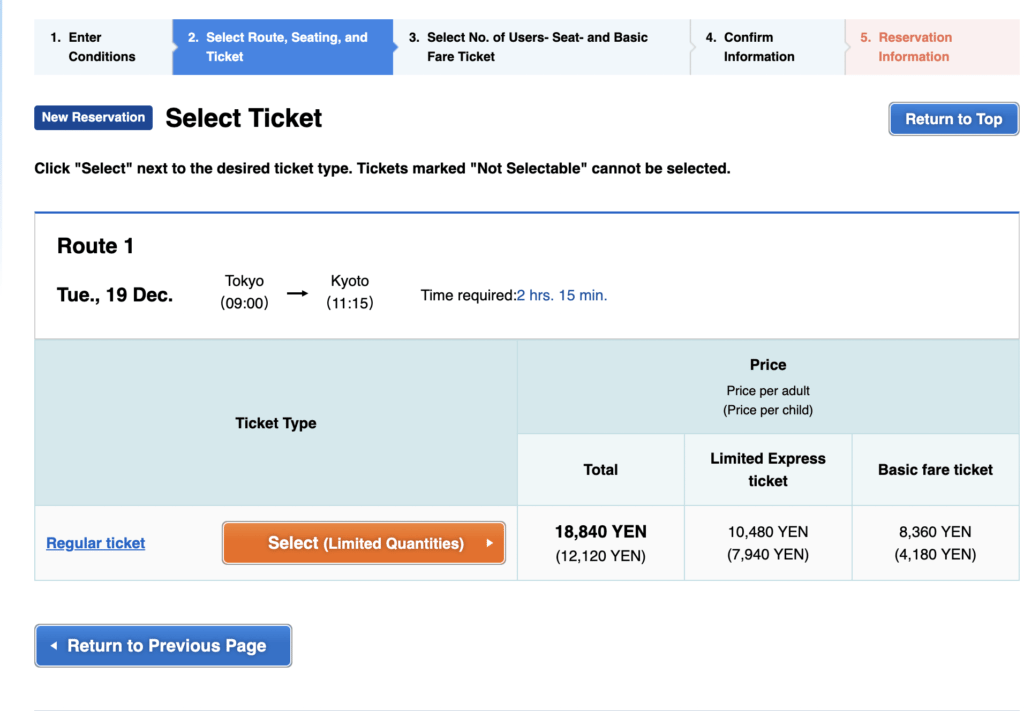
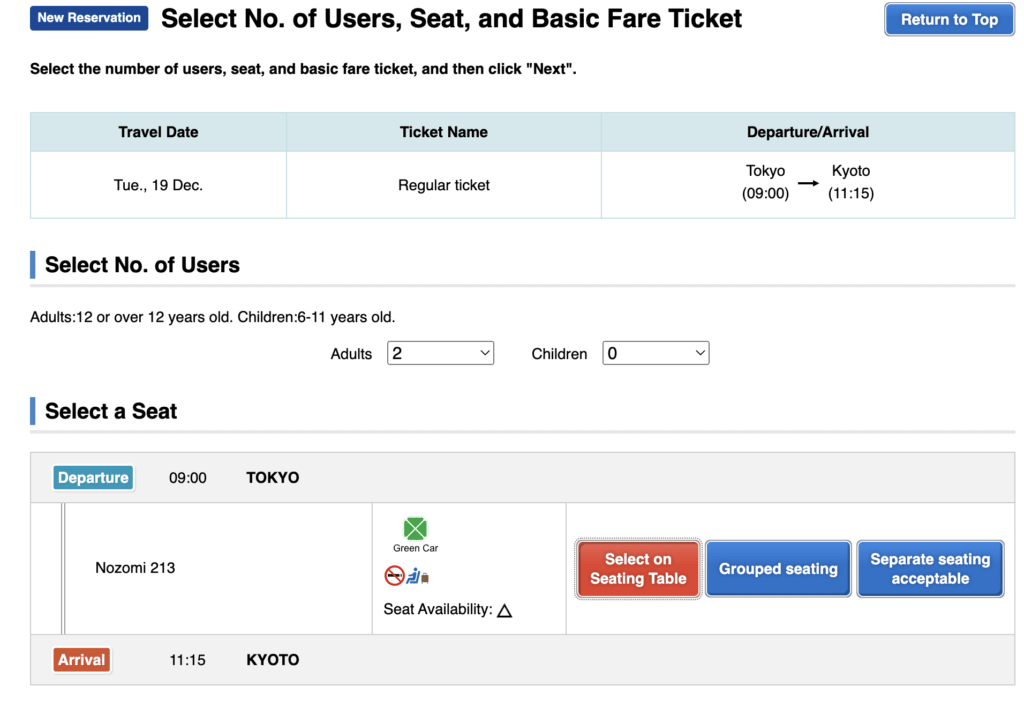
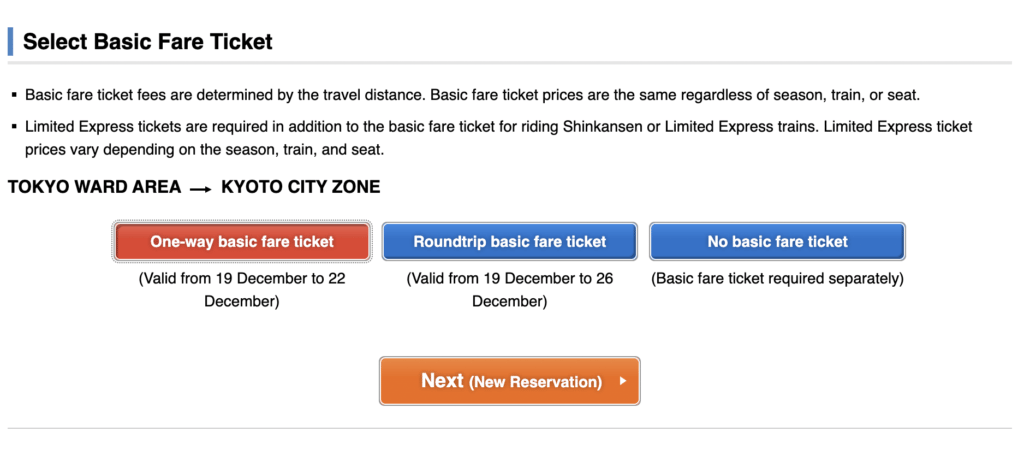
After plugging in some details and information, you can now select the number of passengers and the seats you want. Choose "Select on Seating Table" to pick your own seat. The other two options will choose for you. Remember to also select either one way or roundtrip basic fare ticket (depending on which you're doing). Remember, do not select no basic fare ticket, it's always required.
Lastly, select your seats. As you can see, oversized baggage is always at the back on the car, but there is so much room, it may be even better than the other seats in the car.
Lastly, confirm everything and pay by credit card.
Green Car or Ordinary Car on Train?
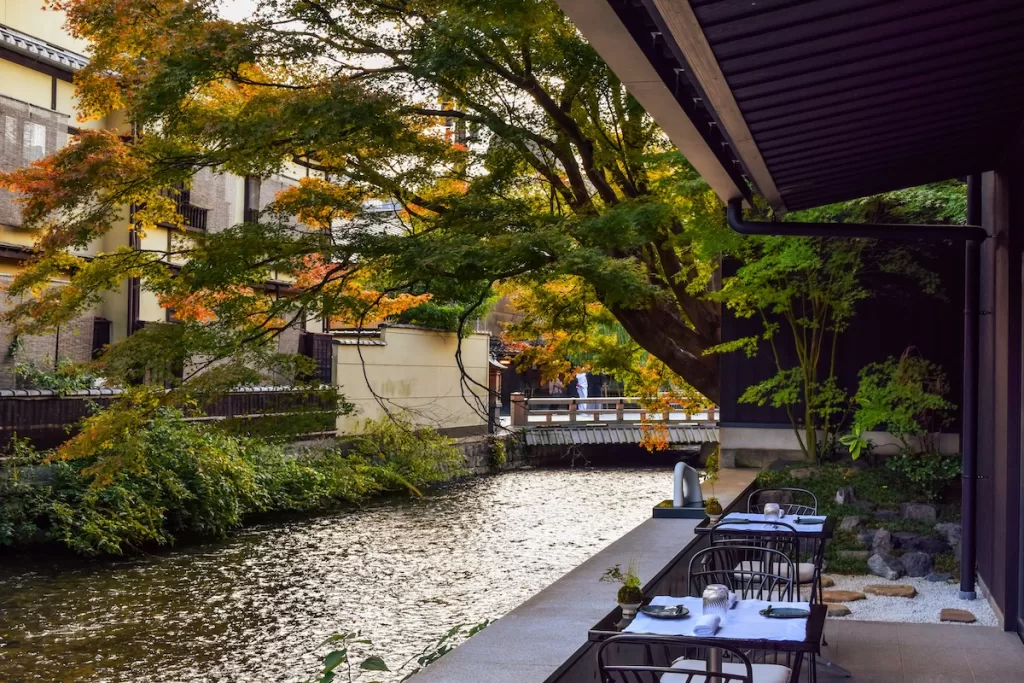
For those still not certain about whether to spend a little extra on the green car vs the regular car. Here are some videos and photos from my travels of each for reference. The following is the green car. Extra legroom, reclining seats, if you book the seats with "oversized baggage" you get a whole reserved compartment for your luggage...etc.
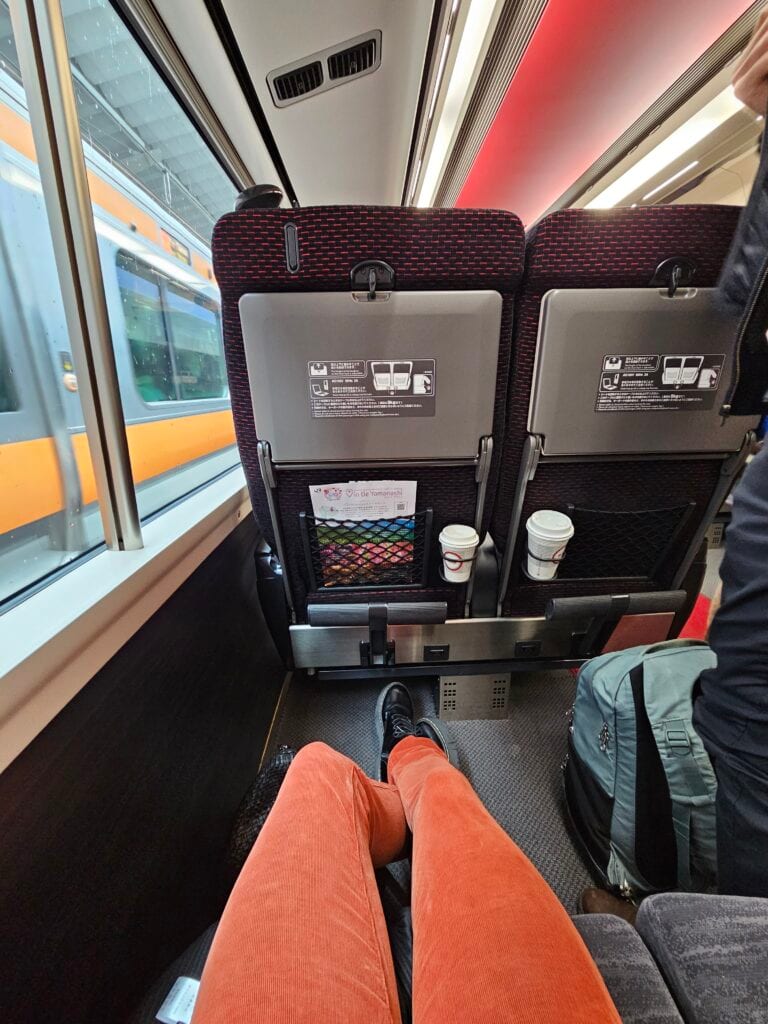
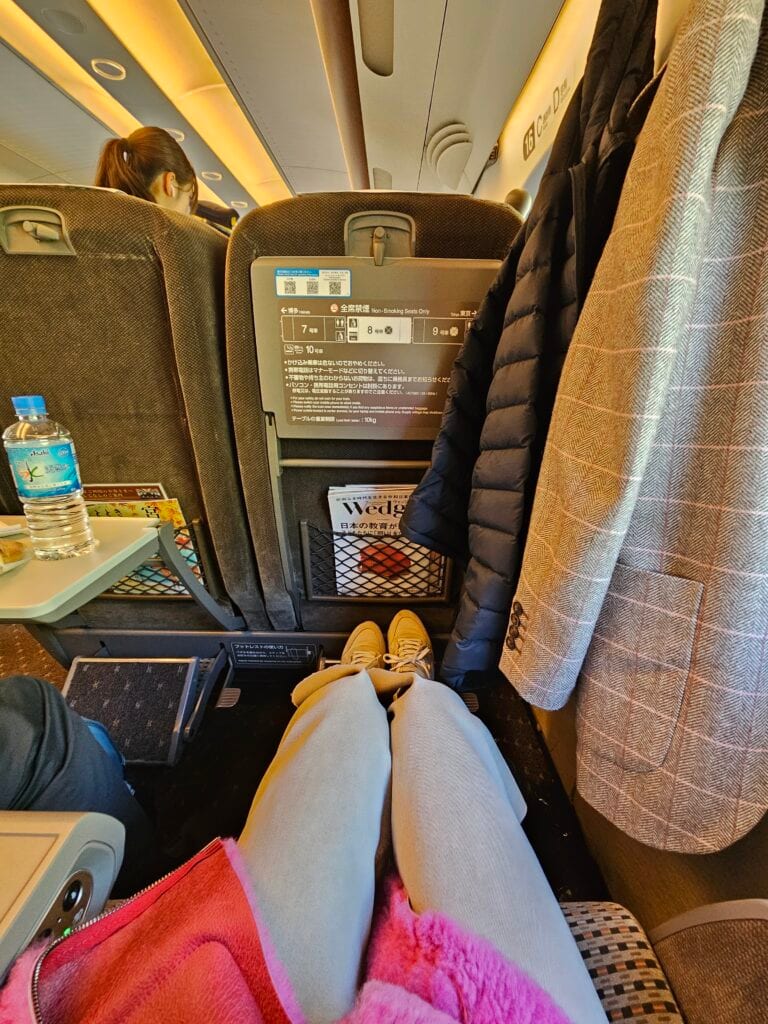
And here is the regular car. Sometimes seats get booked so quickly, you have to stand because there are no seats available. Just like Pat and I had to do when going from Otsuki to Kawaguchiko.
Japan’s train and subway system is brilliantly efficient — but only if you understand the ticketing quirks. Get a PASMO for subways, book your JR tickets early, don’t forget to tap out, and splurge on a Green Car when you can. Trust me, your jetlagged self will thank you.
Online via JR websites, then pick up at a JR office in Japan. Or buy directly at the station.